Body
Components
Examples of typical layouts that may be found at certain types of level crossings.
We are in the process of reviewing and updating these diagrams.
The diagrams are provided for guidance only and are not a standard mandating what the layout of a level crossing must look like.
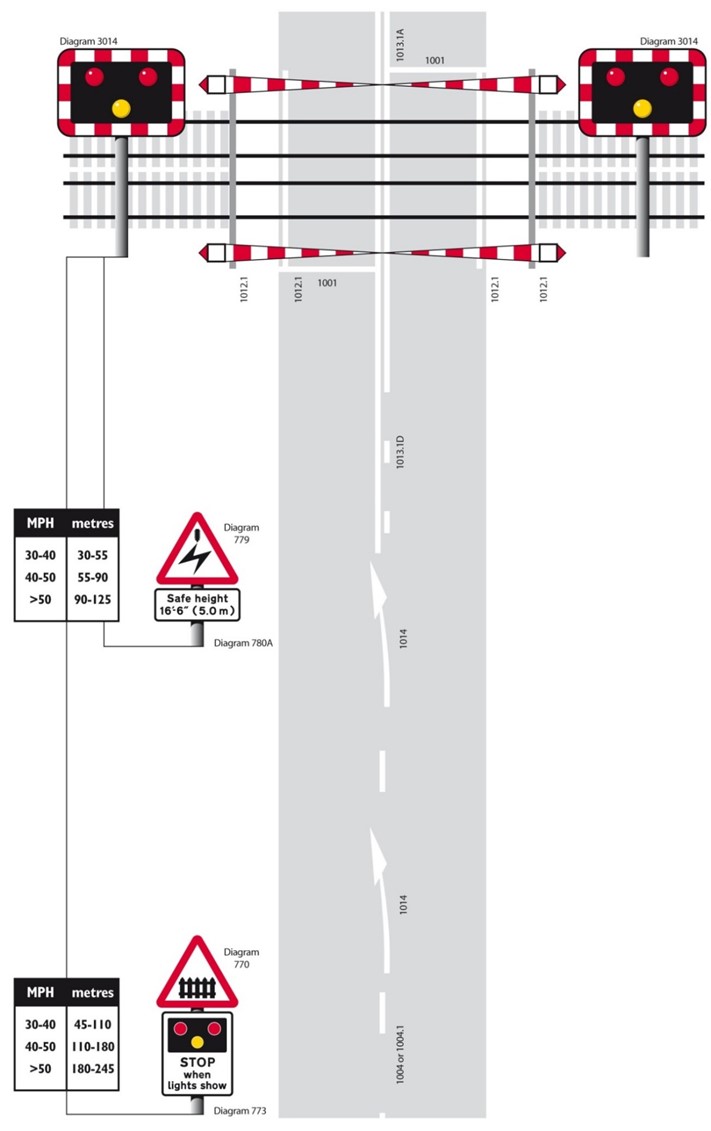
Barrier crossing (with additional risks) Collapse accordion Open accordion
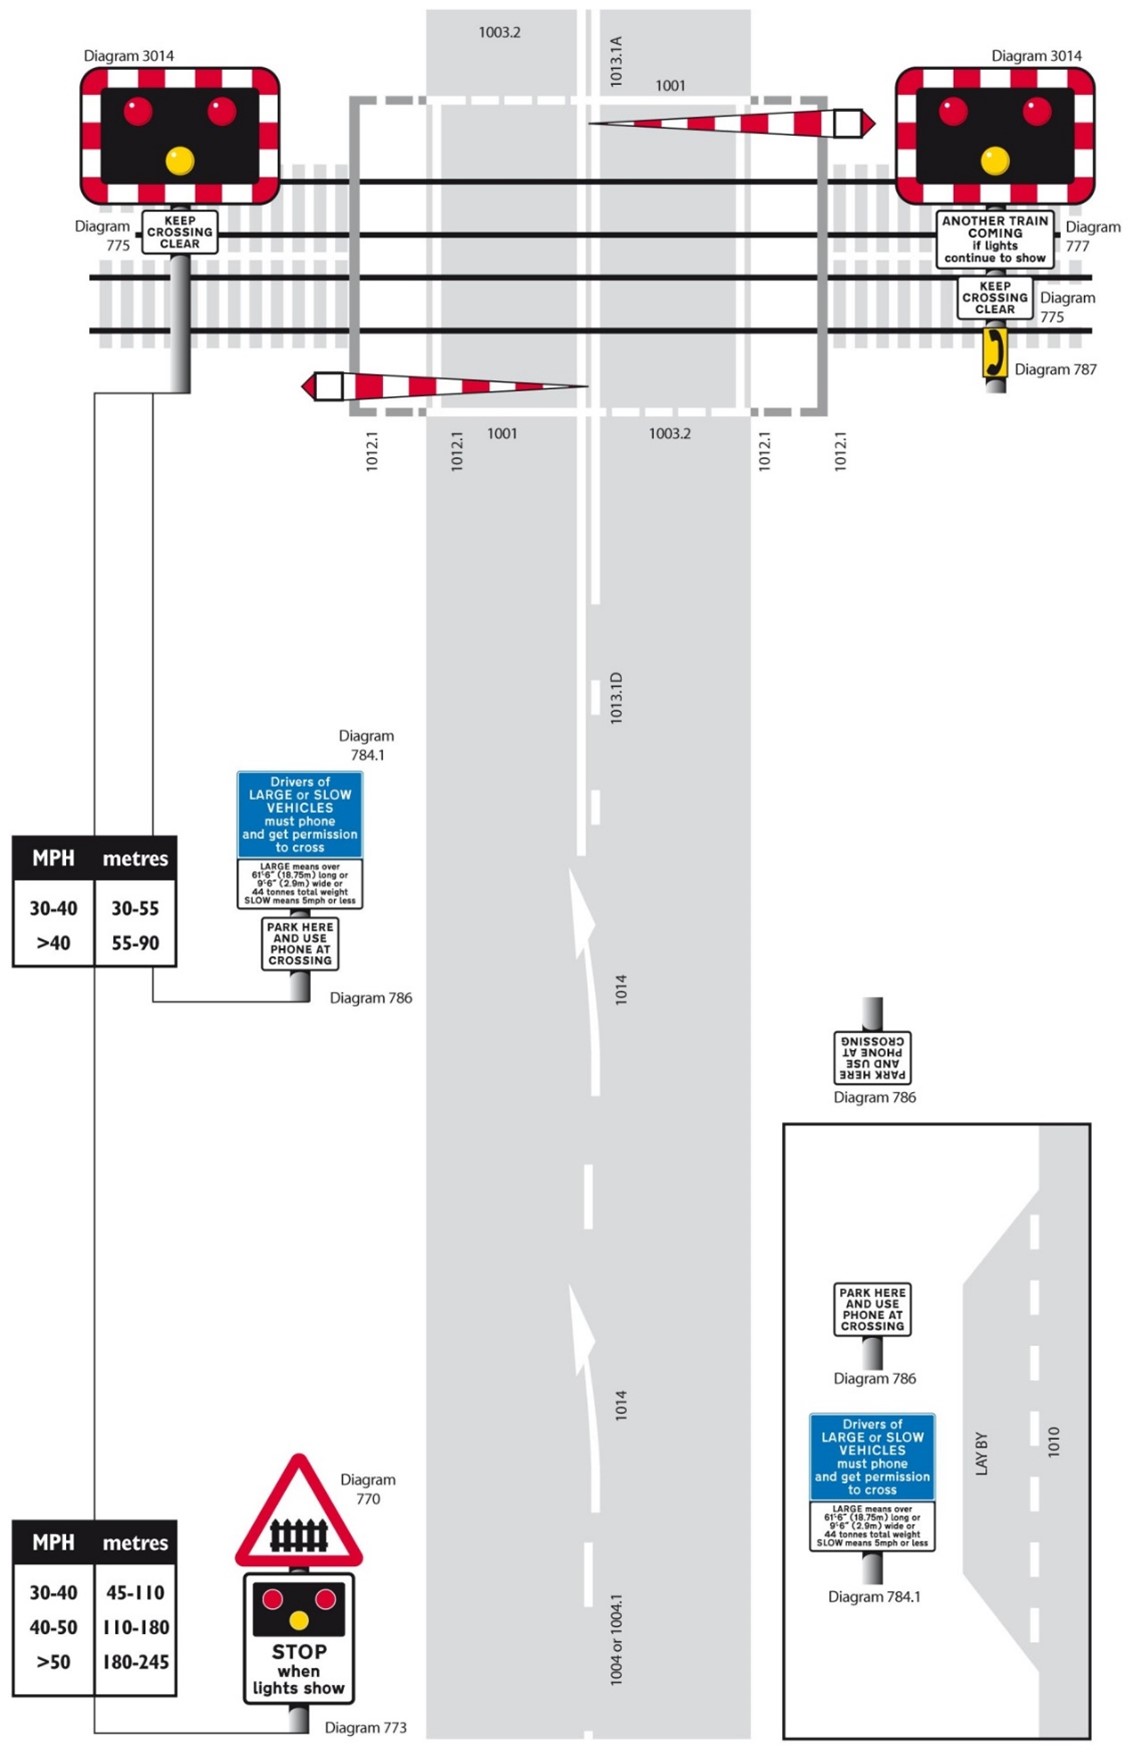
Automatic half barrier crossing or automatic barrier crossing (locally monitored) Collapse accordion Open accordion
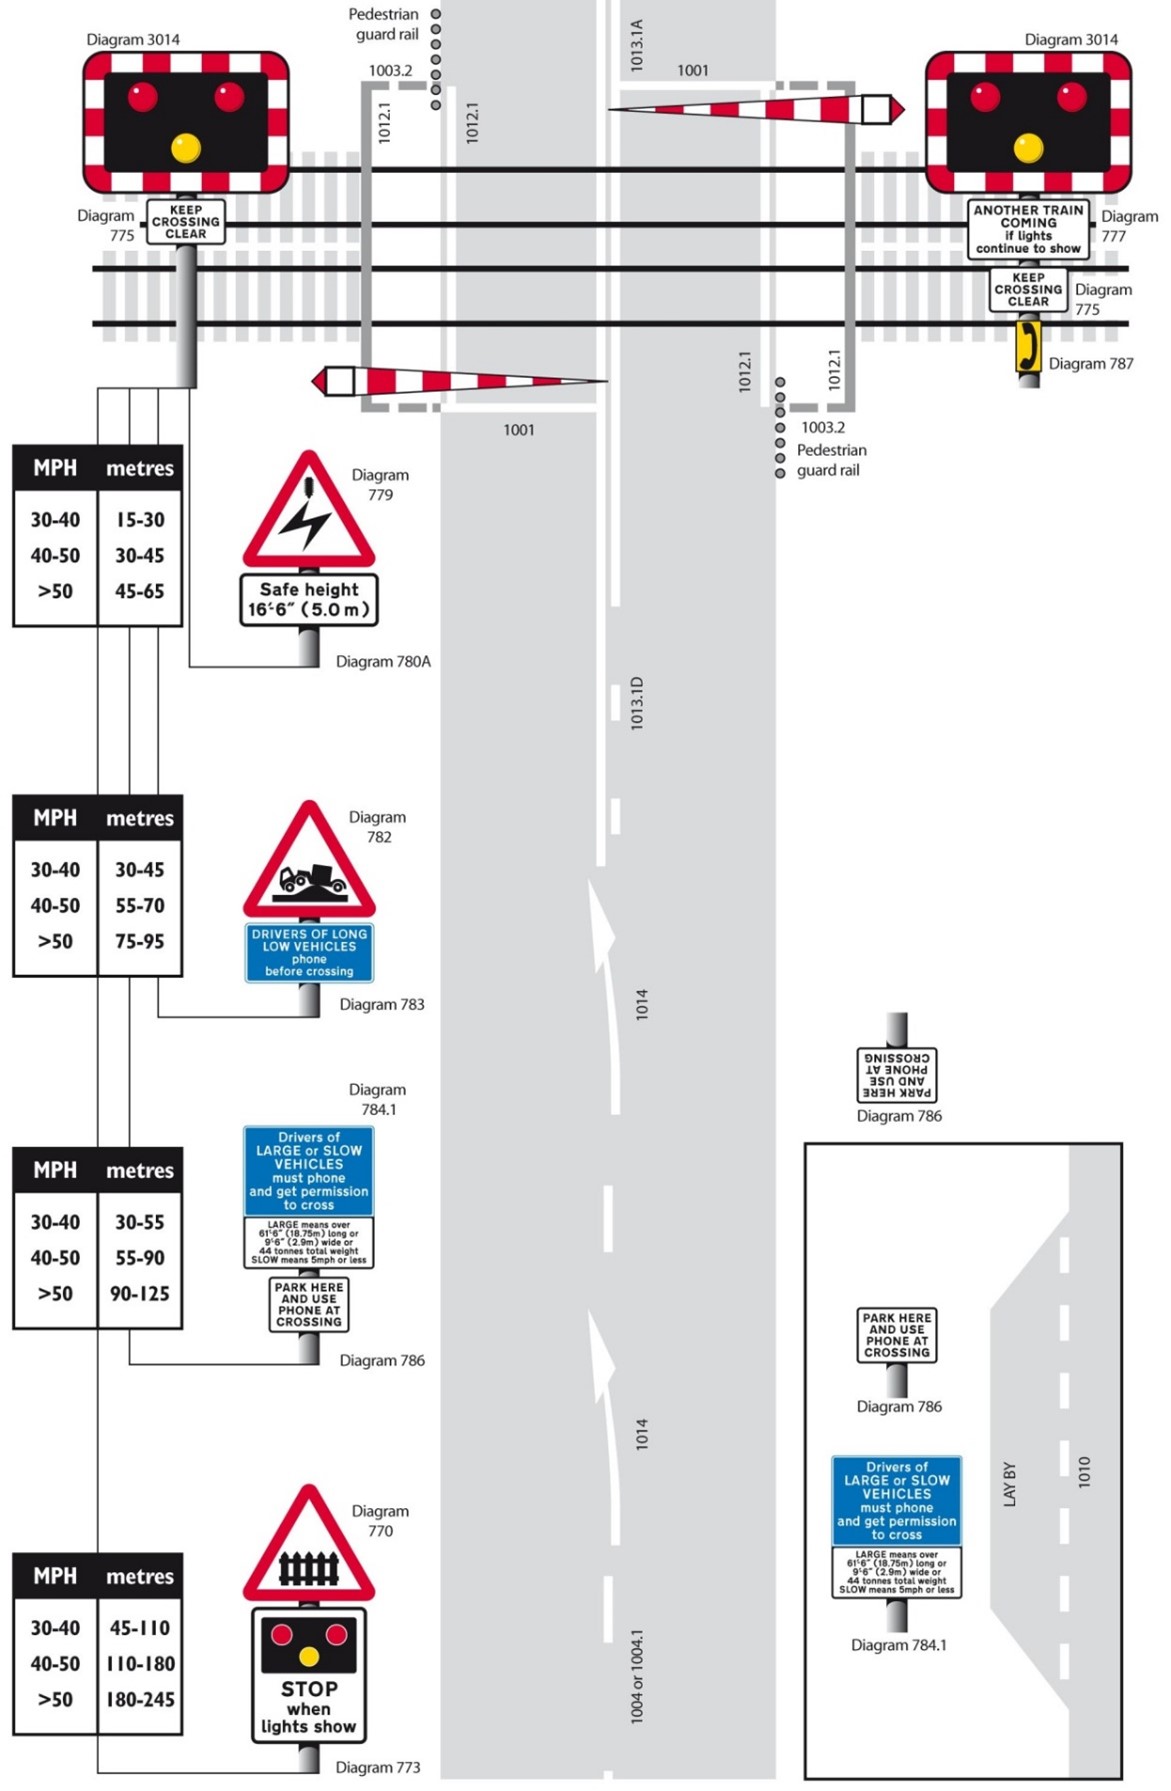
Automatic half barrier crossing or automatic barrier crossing (locally monitored) (with additional risks) Collapse accordion Open accordion
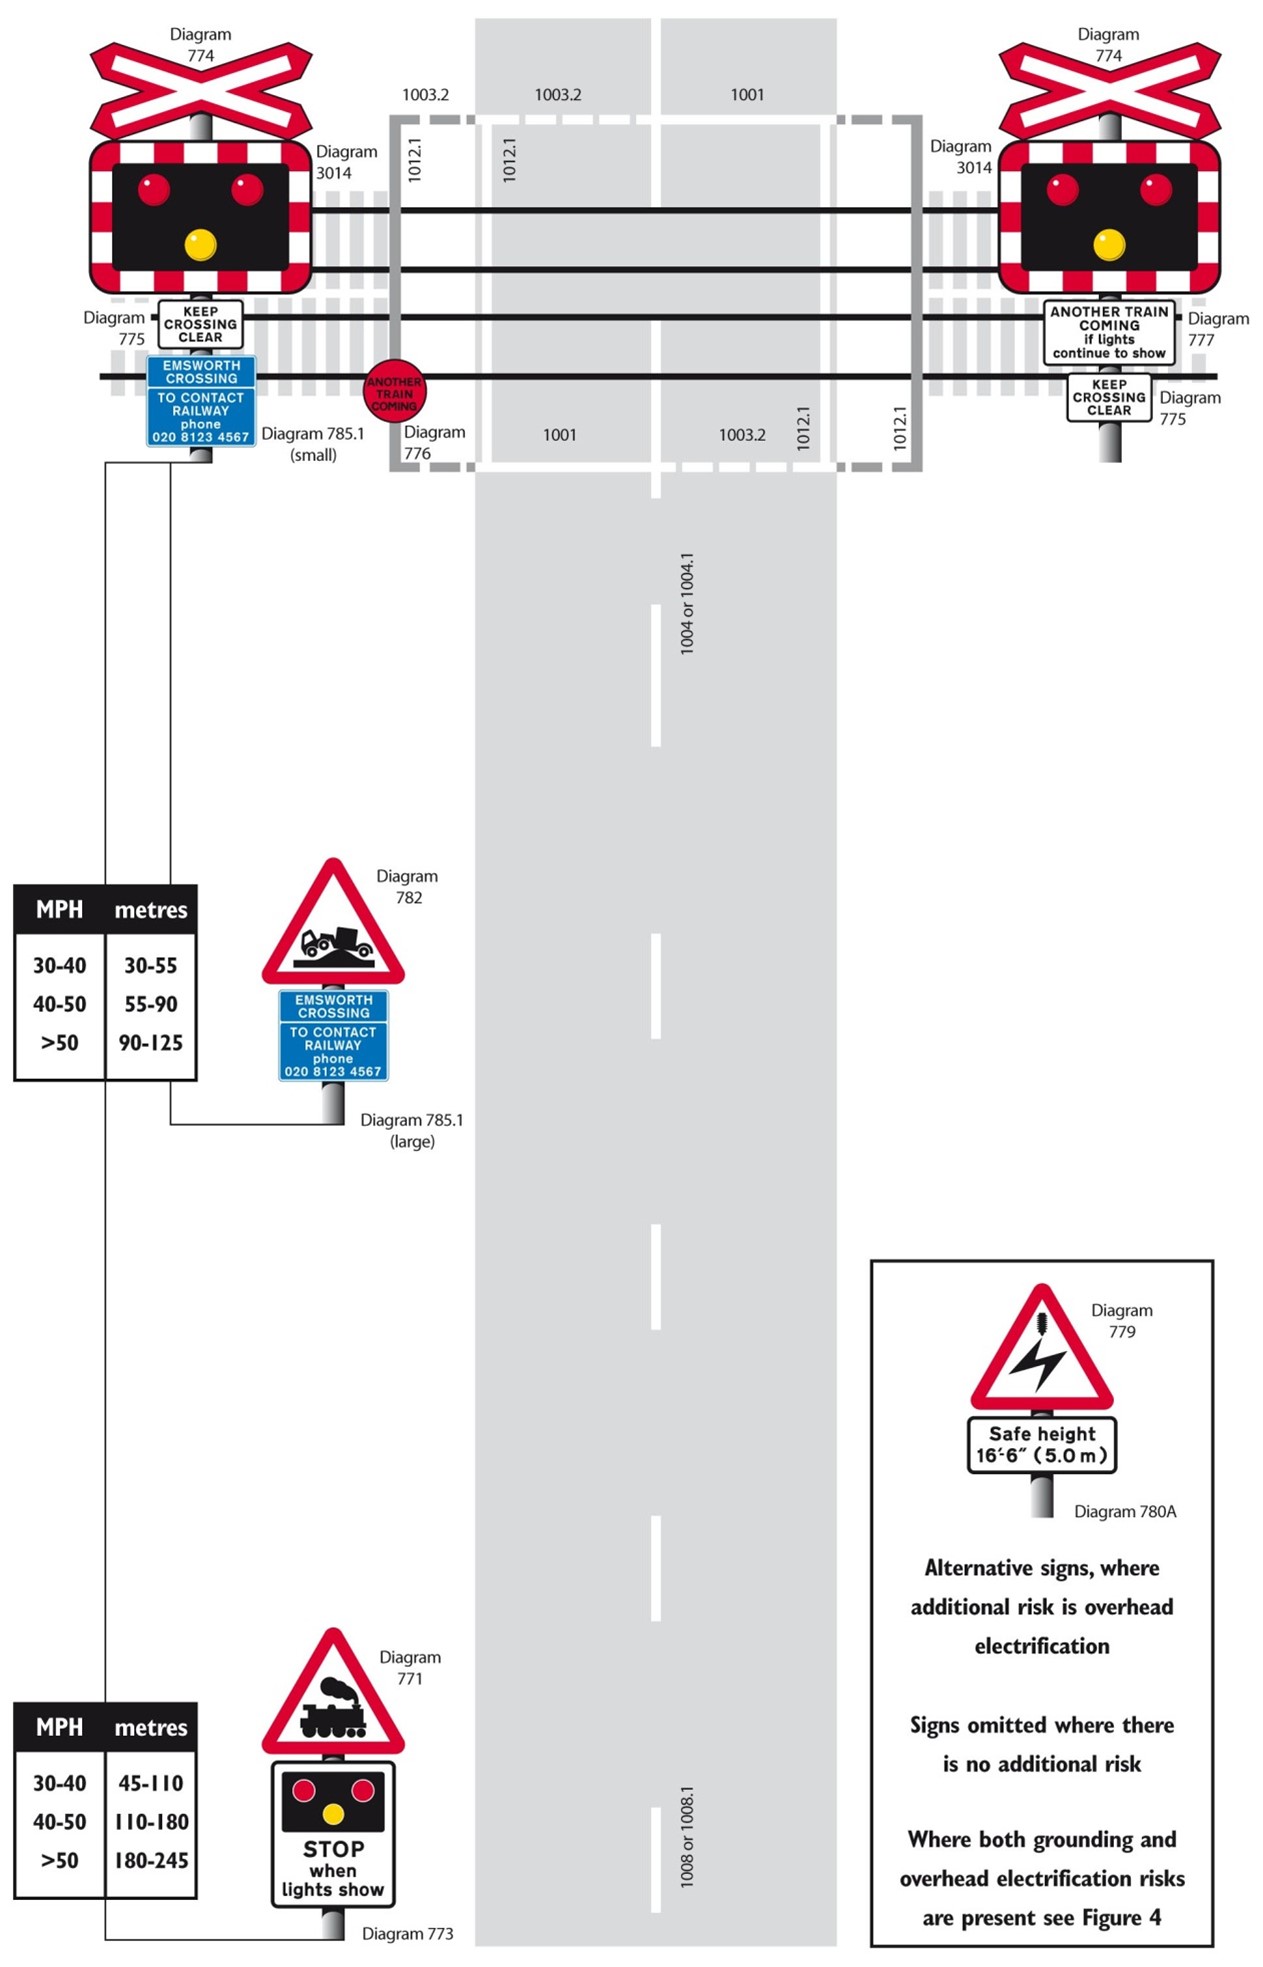
Automatic open crossing (with additional risks) Collapse accordion Open accordion
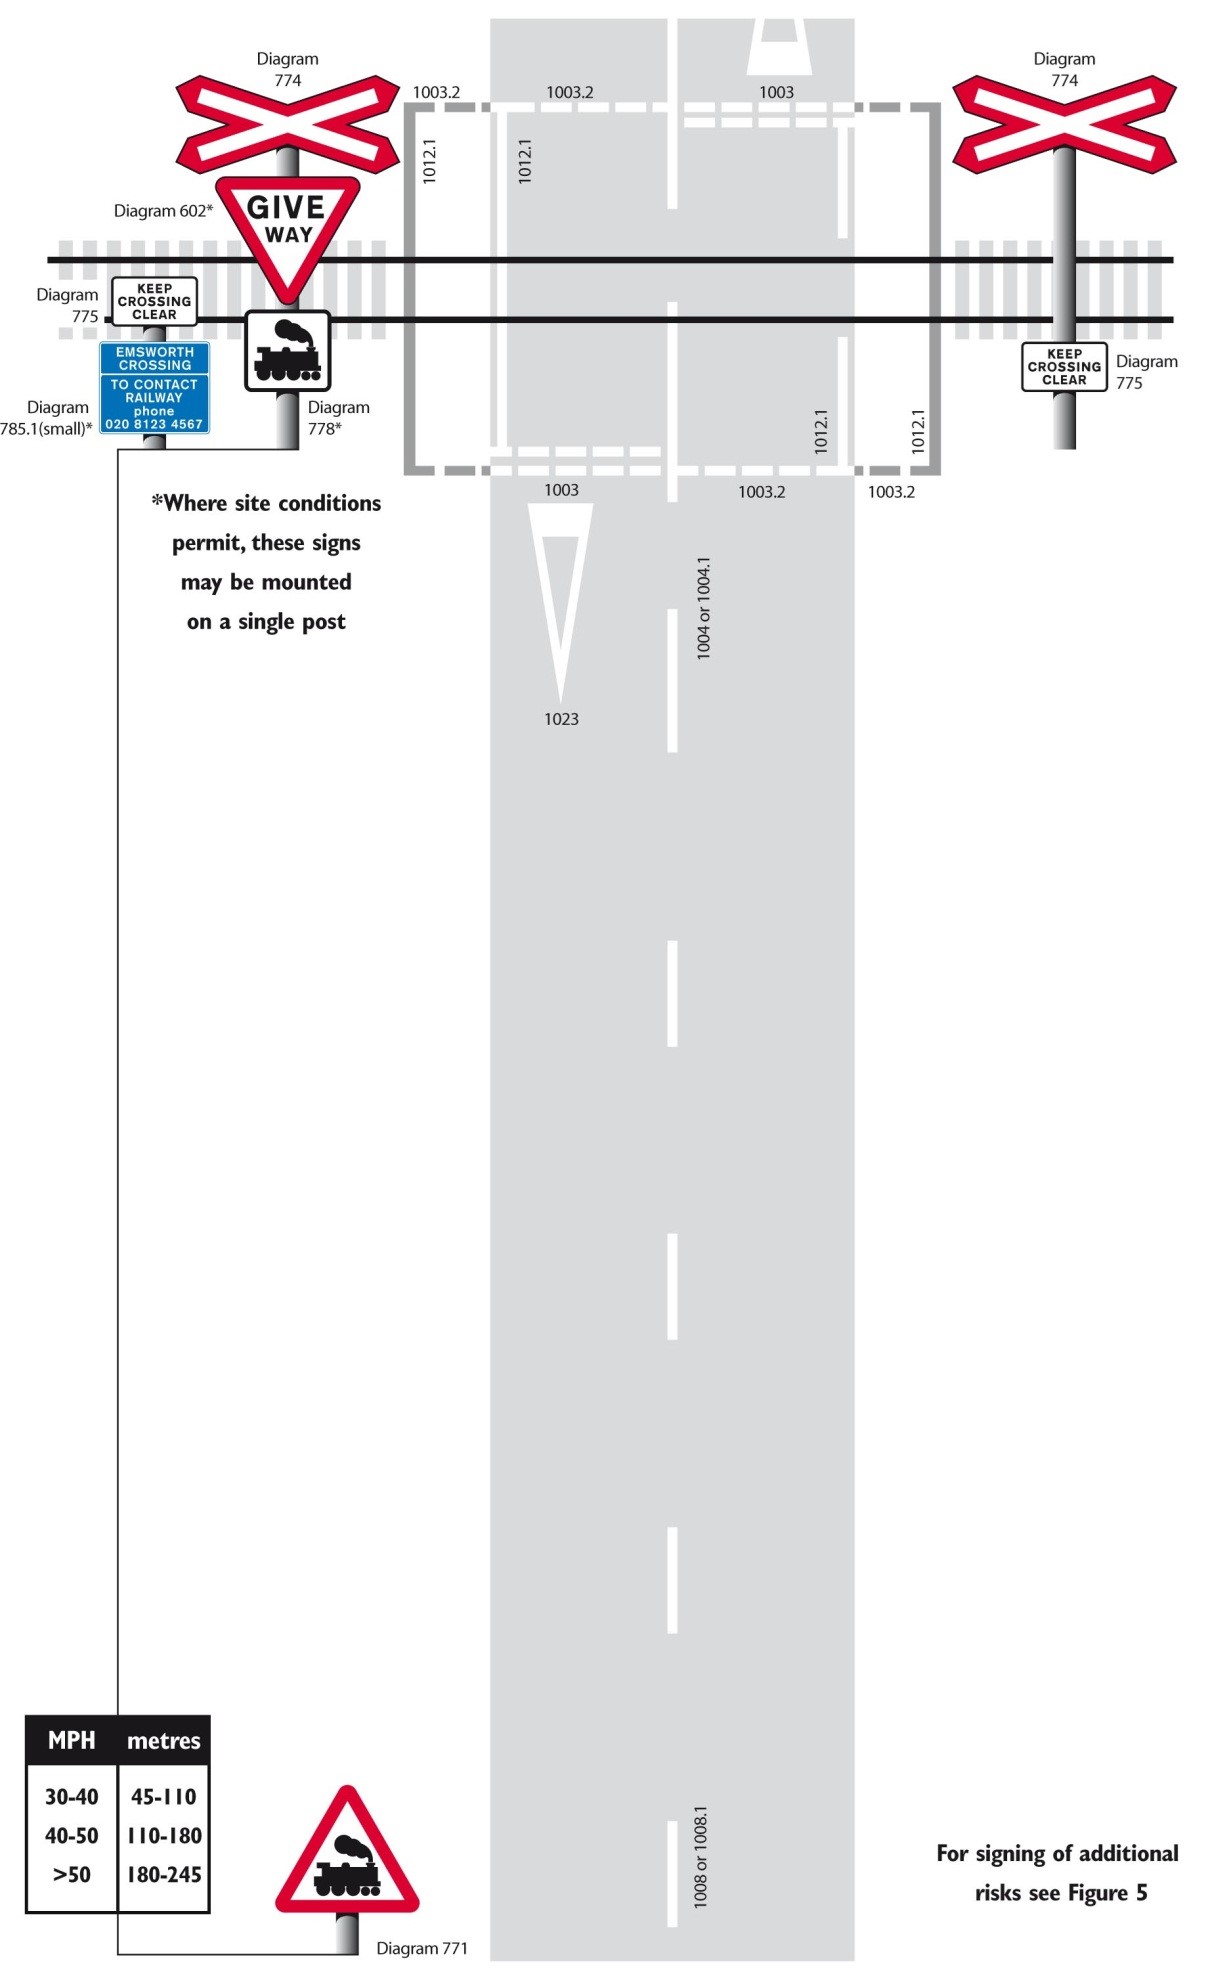
Open crossing Collapse accordion Open accordion
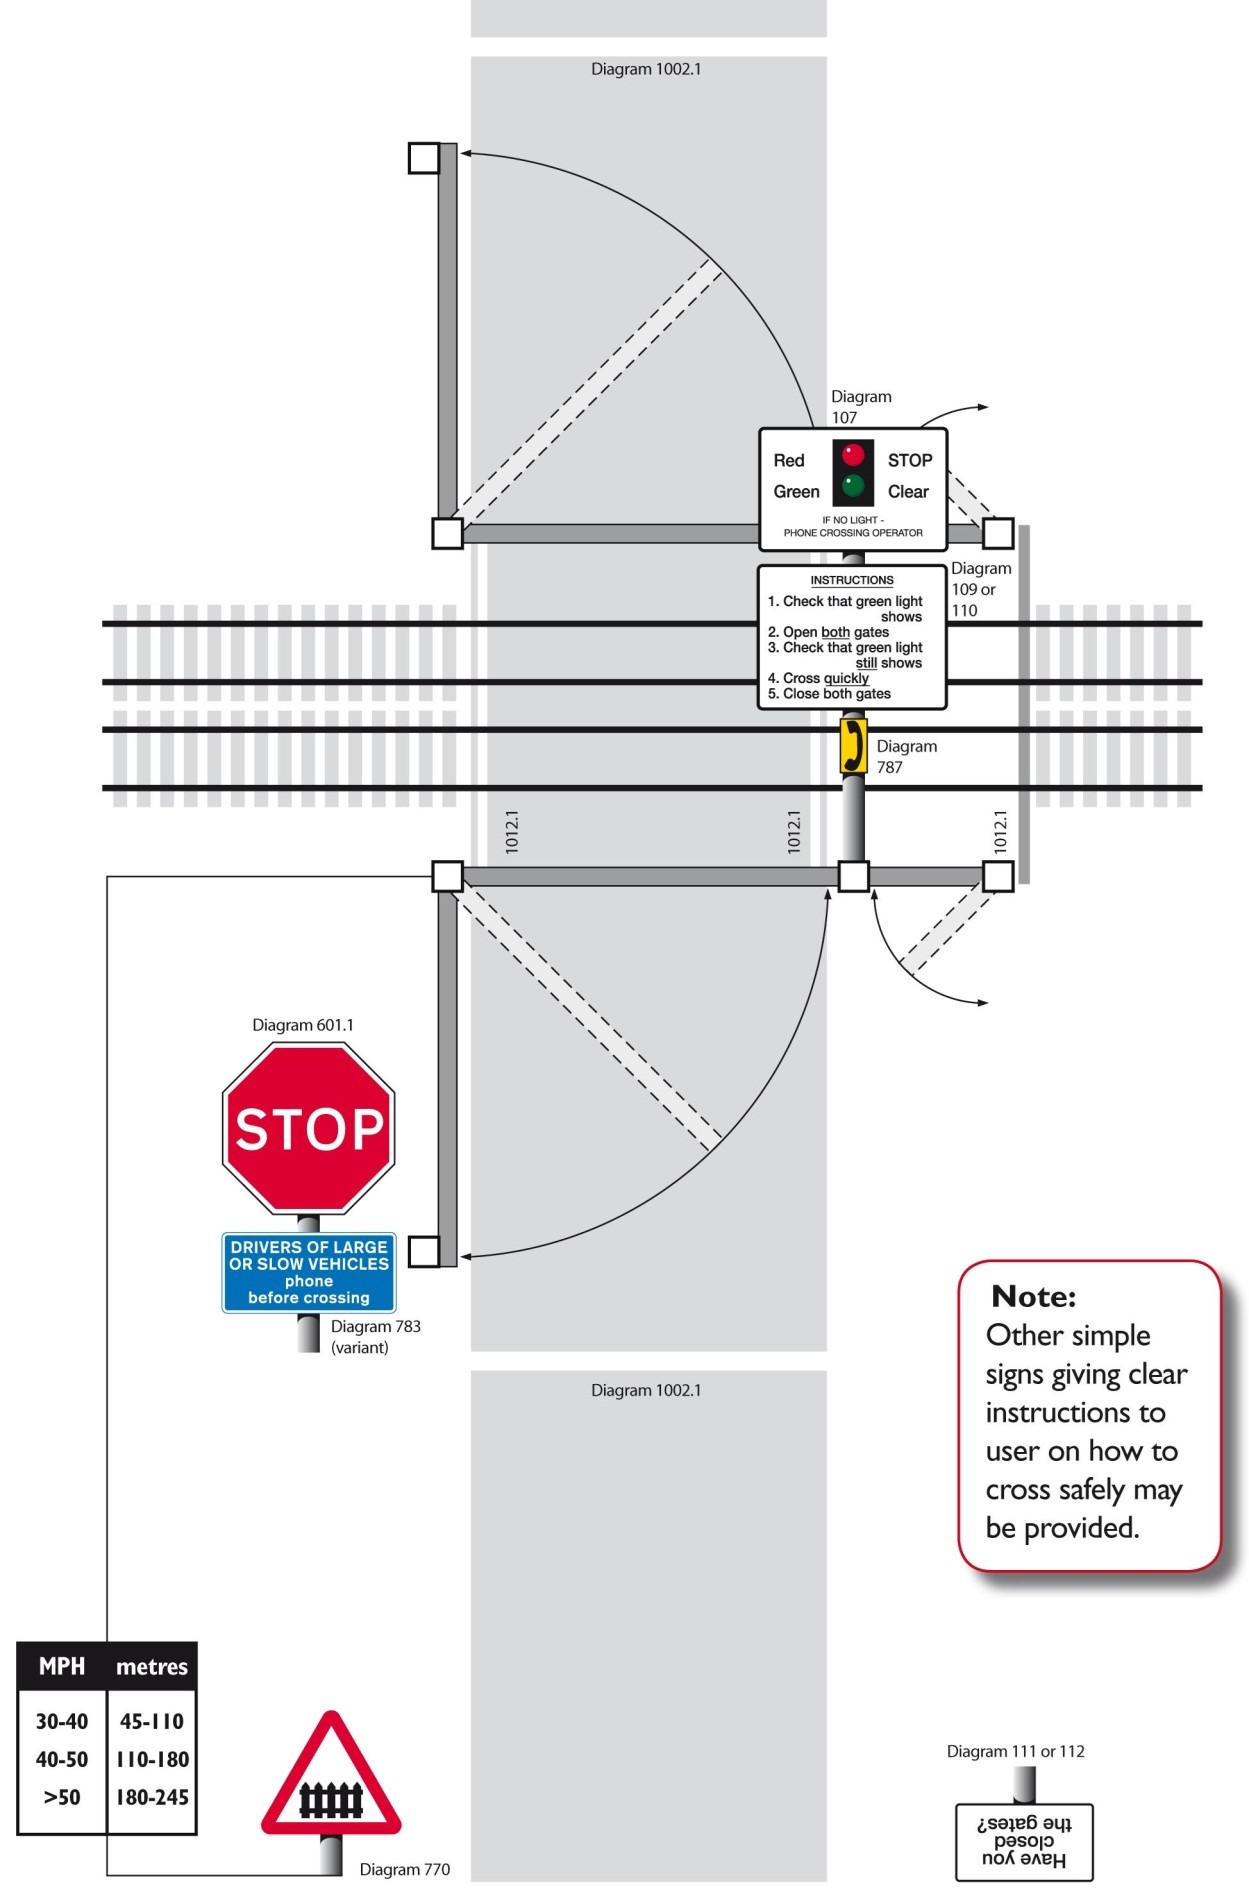
User worked crossing with adjacent footway or bridleway Collapse accordion Open accordion
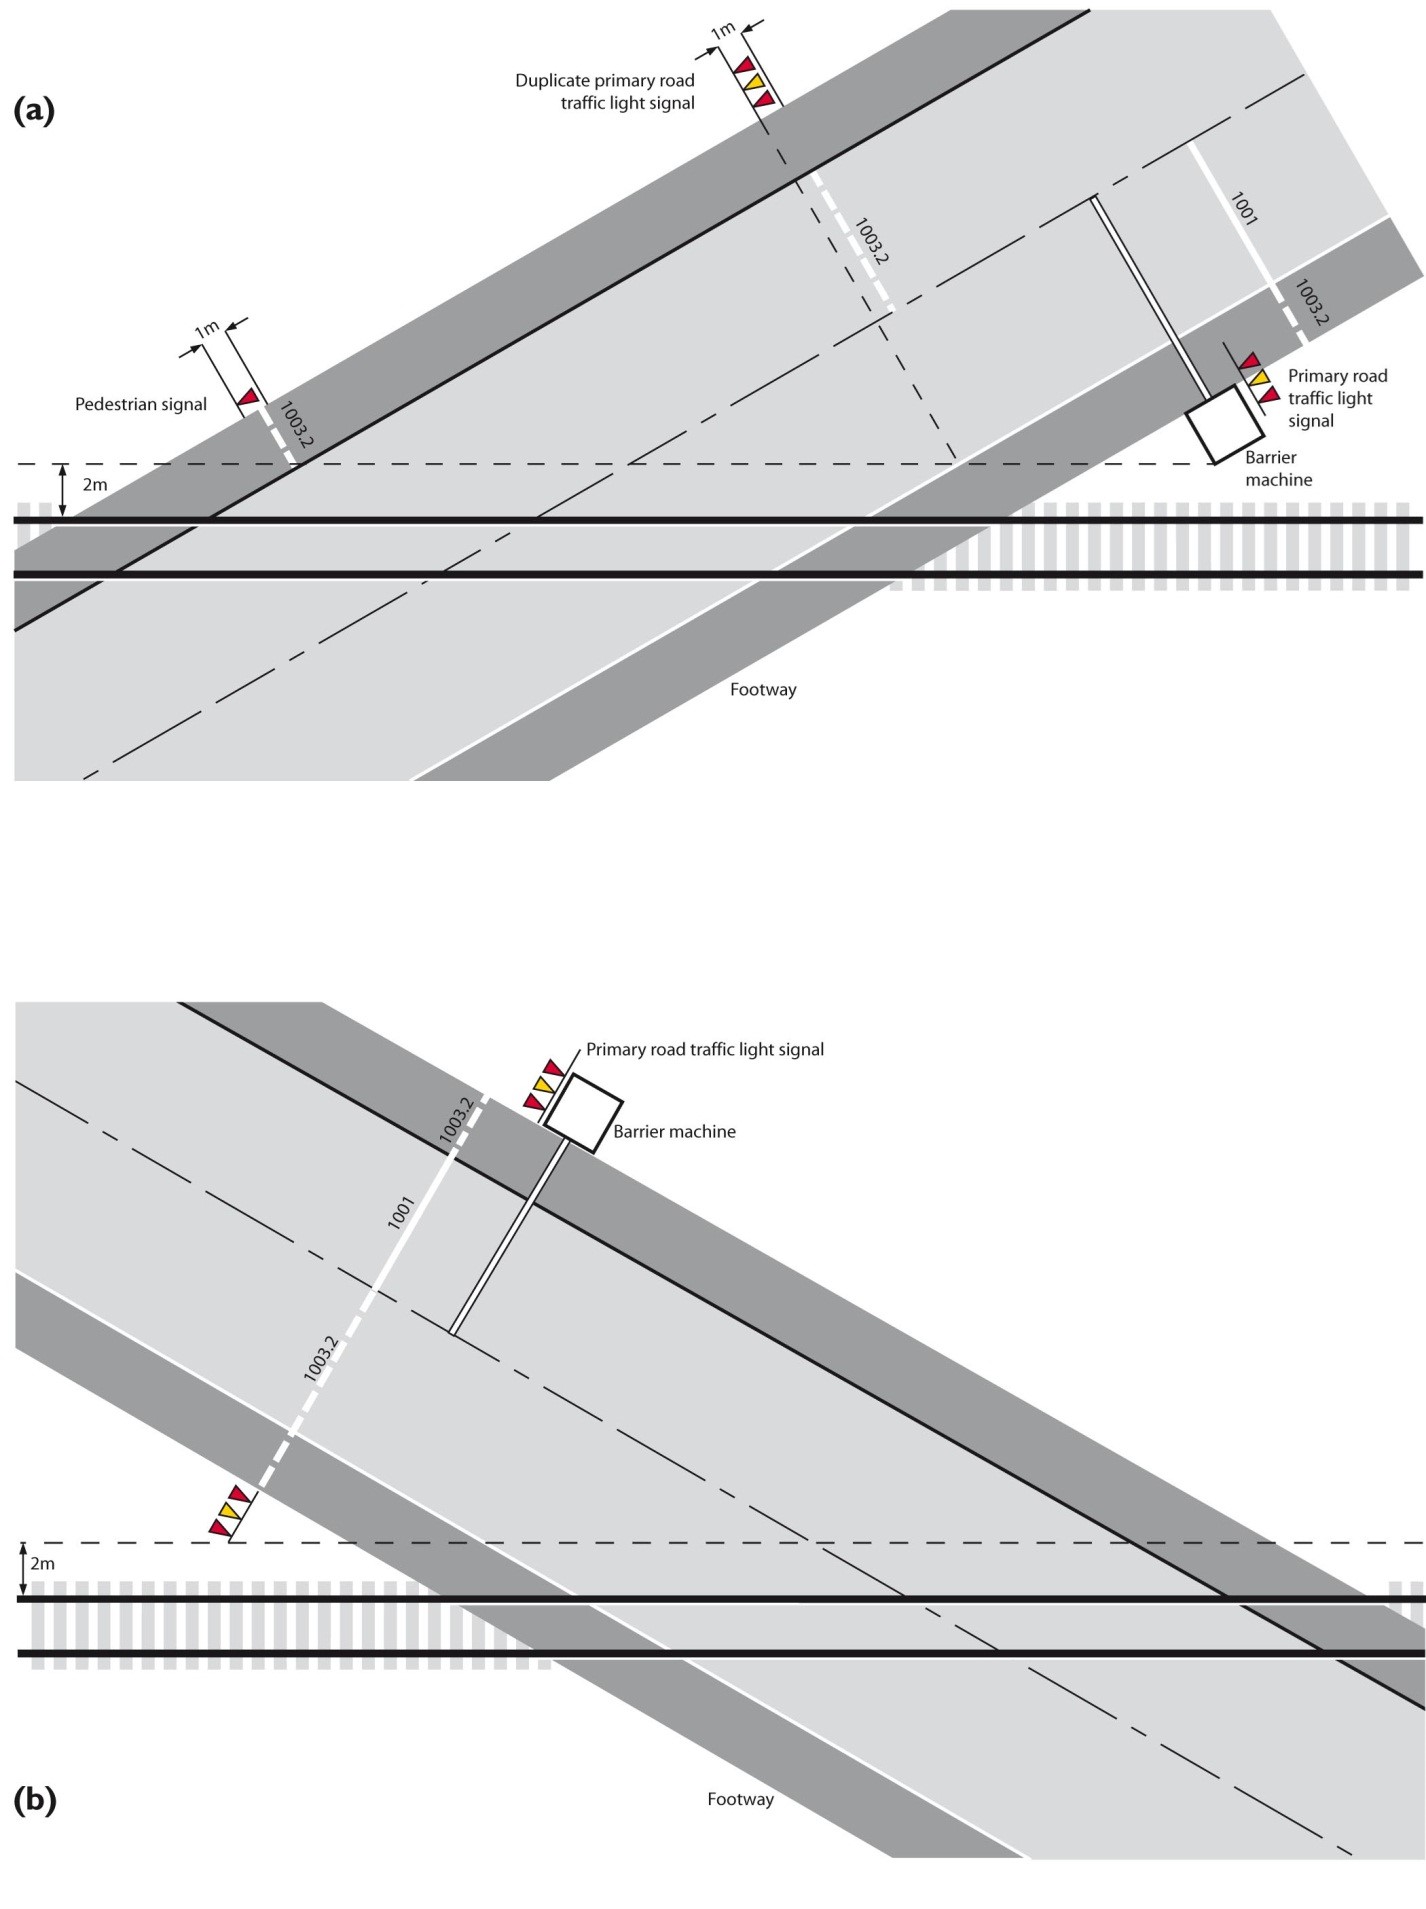
Obtuse skew crossing (a) and an acute skew crossing (b) indicating the arrangement of the transverse road markings and road traffic light signals (not to scale) Collapse accordion Open accordion
Recommended minimum visibility distances table Collapse accordion Open accordion
Additional tables are available in the traffic signs manual published by the Department for Transport.
Recommended minimum visibility distances
| 85th percentile speed of road vehicles - kilometres per hour (km/h) | 85th percentile speed of road vehicles - miles per hour (mph) | Minimum visibility distance (metres) |
|---|---|---|
| 50 | 30 | 70 |
| 65 | 40 | 90 |
| 80 | 50 | 150 |
| 95 | 60 | 220 |
| 115 | 70 | 300 |
*If these minimum visibility distances cannot be achieved consider further measures, for example the provision of additional advance warning signs or countdown markers.